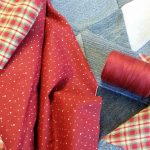
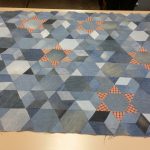
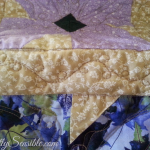
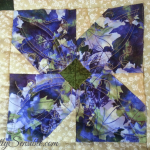
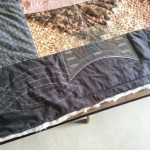
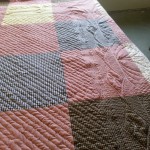
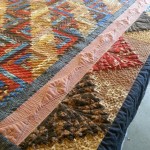
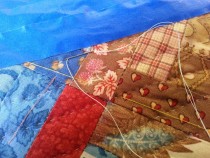
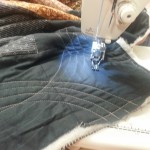
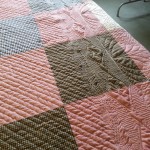
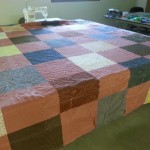
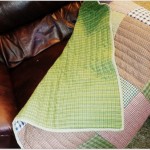
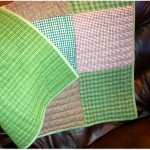
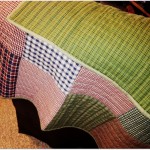
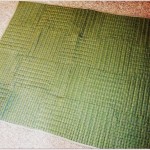
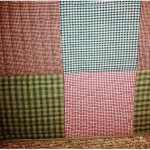
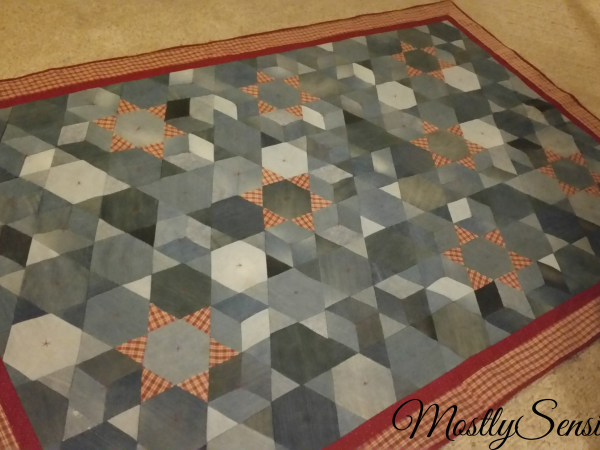
Throw Blanket Gifts

Plaid Throw Blanket

A month ago I planned to sew together a gift to give to my parents who were coming for a visit near the time of their birthdays.  I also wanted to send with them home with a throw blanket for my grandma who is home-bound and whose birthday was also coming up.  The days clicked by, and my parents' visit was suddenly upon me!  I had just one week to complete the projects!  So my wonderful husband helped me out by watching the kids and doing the homeschool sessions with them while I quilted.  

I did a simple 10-inch block using fabric from my stash.  It worked out well because some of my stash I got from rummaging through my grandma's material that she doesn't use anymore.  So I knew that she would love the colors and pattern.  The quilt pattern was a simple straight line going opposite directions on each block.  Each quilt took me one day to complete (not doing anything else).  Not bad!  

Plaid Stash

Plaid Stash

Plaid Stash

Plaid Stash

Pressing the Back

Pressing the Back

Even Feed Foot made this project easy.

Even Feed Foot made this project easy.

Grandma's blanket is her style.

Grandma's blanket is her style.

Simple quilt pattern.  Each block's rows are quilted in opposite directions.

Simple quilt pattern. Each block's rows are quilted in opposite directions.

Close up of the quilting.

Close up of the quilting.

The same pattern is on the plaid throw blanket.

The same pattern is on the plaid throw blanket.

Plaid Throw Blanket

Plaid Throw Blanket

Closeup of the blocks.

Closeup of the blocks.

I like how the quilting made a cross-hatch pattern.

I like how the quilting made a cross-hatch pattern.

IMG_1061

Plaid quilt.

Plaid Throw Blanket

Plaid Throw Blanket

Plaid Throw Blanket

Plaid Throw Blanket


facebooktwittergoogle_pluspinterestmail

Log Cabin King

“To everything there is a season…a time to rend and a time to sew” (Ecc. 3:7)

“My transgression is sealed up in a bag, and Thou sewest up mine iniquity.” (Job 14:17)


Finished Top

Finished Top

It's a work in progress!  The Log Cabin pattern is one of my favorites!  I've been working on this for about a year now.  One of these days it will be done. 

The bed my husband and I share has really been neglected for a while.  I am on a mission to get our room to be a special place for us, and the biggest part of that is this quilt.  Aron gave me his input as to what colors he liked, and he said, “dark red, blue, and muted, autumn colors.”  Great.  How do I incorporate that into what I had in mind?  So I found this set of fabrics in a honey-bun, pre-cut set of fabrics.  The fabrics are replicas of Civil War Era fabrics.  So I started looking for those color schemes.  Some day the colors will be on the walls.  When I told my hubby about all of this his comment was, “OK.  So we're going to have a Civil War in our bedroom?!”  Ha ha!  Well, only with the colors.  

Finished Back

Finished Back

I really like how the back turned out. I didn't quite have enough of the red gingham that I had purchased, so I chose fabrics from my stash that matched the colors of the front and just did a simple square patter with the gingham as the main color (half of the squares are gingham.) I like how simple it is, and if we get bored with the top, we can just flip it over for a while.  I like that!

Well, I've decided to go ahead and hand quilt the whole thing.  Basically, it is just too much money to send it out to be long-arm quilted.  Even the places here in Missouri that let me “rent” a long arm machine by the hour or by the day end up being too much.  I wasn't sure what I was going to do, but then I got to thinking.  At first, I was going to have the machine quilter leave off, or not quilt, the corners and maybe some borders anyway. That way I could do a little bit of hand quilting on those spots.  So why not just go ahead and do the whole thing by hand?  I have actually enjoyed the little bit of hand quilting that I've done.  There are definite advantages to hand quilting — more precise patterns; no fooling with bobbins and sewing machine mishaps; more freedom with the pattern than I would get by sending it out to be done; portability of not needing to “plug in”; not to mention the pride of doing a hand-quilted project.

Civil War Color Scheme

Civil War Color Scheme

PLUS, it may even be easier for me to sit down with the quilt and my needle and frame to do the hand quilting.  The kids like me to sit out in the living room with them to watch their shows and their playing, rather than hide in the sewing room with my machine.  (Which is why I hardly do any quilting at home!  I rely on our monthly Sew N Share at my church…one full day of quilting per month is what I get, and I can turn out about a quilt per year just in those 12 sessions….well less than 12 because some months the scheduling just doesn't work out.)  It was looking more and more like this was the way to go!  I mentioned this change of plans to my husband, and his comment was, “Well, of all the quilts to do by hand, this would be the one, right?”  :-)   I'm sure he likes the price tag better too!

I used this method for the Log Cabin blocks using a “honey bun.”  However, I didn't like the look of using only two fabrics per block.  I preferred the scrappy look of using several fabrics per block.  BUT I did find a way to include my original two-fabric blocks as you see in the pictures below.  I found the honey bun rolls on eBay which was cheaper than buying in a store.  Buying the pre-cuts not only saved me time, but it meant that a designer was picking out the fabrics that matched well together.  Another bonus was that there was very little left-over fabric, and that was a money saver in the end.  I hope you enjoy watching this come together as much as I do.

Finished Top

Finished Top

Finished Back

Finished Back

Backing2 Top2

Getting the pattern right.

Getting the pattern right.

How it looks on the bed.

How it looks on the bed.

   
facebooktwittergoogle_pluspinterestmail

Butterfly Quilt

SONY DSCTwo years ago I made a butterfly quilt for my oldest daughter, Katie.  I had come up with the butterfly theme simply by watching her.  I was not thrilled about doing the typical girly patterns like hearts or flowers.  Those are easy to come by!  But butterflies were all over Katie at the time.  She had them on her shoes, her dresses, her coloring books, her toys, her shirts, etc.  There just seemed to be alot of butterflies.  So I searched the internet for a butterfly pattern that I liked.

This pattern I saw called “Butterfly Town”.  I liked that it was a scrap quilt, but it was a paper-pieced quilt.  I haven't taken the time yet to learn how to paper piece.  What to do?  I made my own pieced version.  It wasn't the most efficient use of fabric, but it turned out pretty.  I had never done the piano-keys border before either, and I loved how it turned out!  I used the leftover scraps from the butterfly material to make the border.  The scalloped edge was done using a scalloped edge tool from Missouri Star Quilt Company.  And it was the first time I had ever tried a mitered corner.  The quilting was done free-hand.  I borrowed a friend's long neck high-speed Juki, which was wonderful!  I gotta get me one of those!  I think it had a 9″ neck.

It wasn't perfect, but Katie likes it!  And I do too.

 
SONY DSC SONY DSC
SONY DSC SONY DSC SONY DSC
facebooktwittergoogle_pluspinterestmail